The fields that make up a table are shown under the “Fields” node in the TreeView for the table. Calculated fields are shown under the “Calculated Fields” node.
When you select a field in Studio, an editor displays the properties for that field. There are four pages of properties. Click the tabs at the top of the properties pane to select the desired page.
Main Page
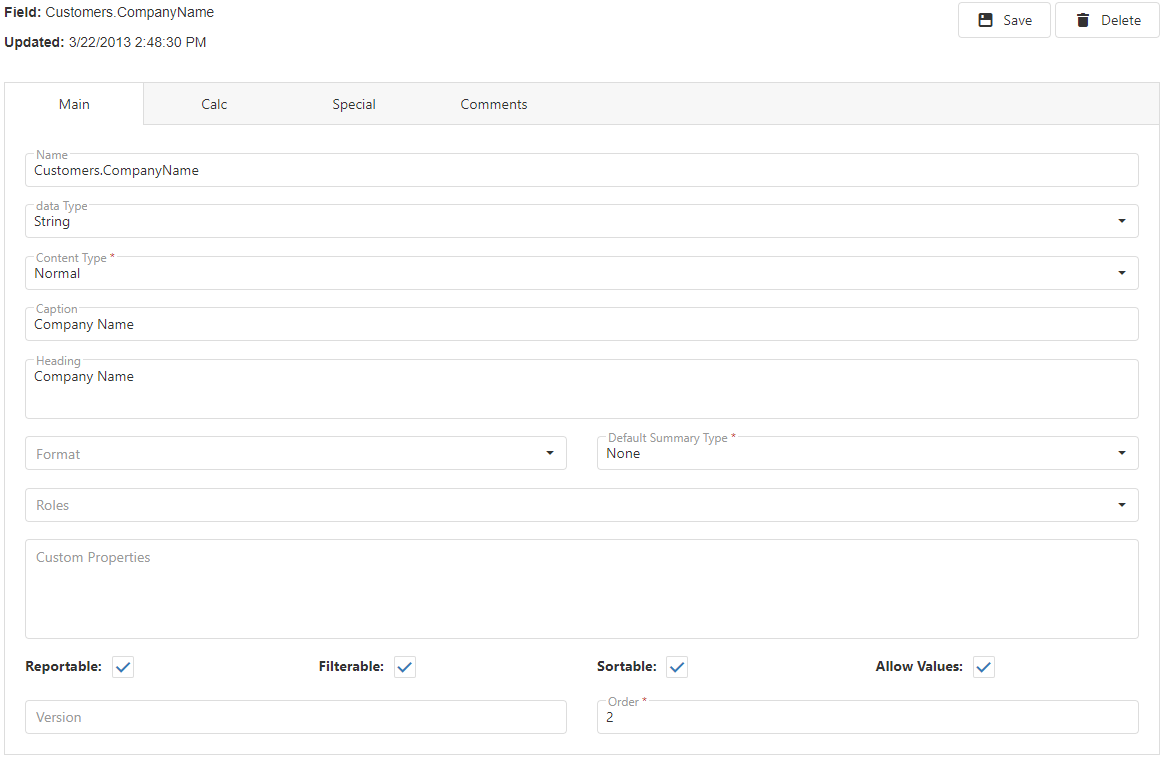
The Main page contains the main properties for a field. The following properties appear on this page:
-
Name: the name of the field. If the name contains characters other than letters, numbers, and underscores, or if it matches a SQL keyword, such as DESC or ORDER, Studio automatically adds delimiters around the name (the delimiters defined in the database properties). It also automatically adds delimiters if you turned on the Add delimiters to all names setting when adding or refreshing the database.
-
Type: the data type for the field. These are .NET data types. The choices are:
Symbol Description Boolean A Boolean field capable of containing True or False (or Yes or No) values. Byte A single byte. Byte[] A byte array, used to hold binary data. DateTime Used for datetime fields. Decimal A 128-bit type often used for monetary values. The range of values supported is ±7.9 x 10⁻²⁸ to ±7.9 x 1028. Double A 64-bit number, with a range of ±5.0 x 10-324 to ±1.7 x 10308. Guid The field contains a Globally Unique Identifier. Int16 A 2-byte integer value. The range is -32,768 to 32,767. Int32 A 4-byte integer value. The range is -2,147,483,648 to 2,147,483,647. Int64 An 8-byte integer value. The range is -9,223,372,036,854,775,808 to -9,223,372,036,854,775,807. Object Used to hold binary data. Single A 32-bit number, with a range of -3.4 x 1038 to 3.4 x 1038. String Used for alphanumeric text. TimeSpan This type contains the span of time between two datetime values. -
Content type: this setting, which is only available for Byte[], Object, and String fields, allows you to specify the type of content for the field, which determines how it’s rendered in a report. The choices are:
-
Normal: the contents of the field are displayed as is.
-
HTML: the field contains HTML so it’s rendered as a browser would.
-
RTF: the field contains Rich Text Format text so it’s rendered similar to how Microsoft Word would.
-
Image: the field contains an image so the picture is displayed.
-
ImagePath: the field contains the path to an image so the picture is displayed.
-
-
Caption: the name as displayed to the user in the report writer. If the caption is an expression that should be evaluated, surround it with curly braces. For example, if the caption calls the GetCaption plugin, specify “{GetCaption()}” (without the quotes) for the caption. Note the expression is evaluated every time the field is accessed, so you get better performance by changing the caption in the AfterLoaded method of a data dictionary plugin instead.
-
Heading: the default column heading in a report. This defaults to the same value as Caption, but can be changed if desired. For example, if a narrow field (such as a 3-character wide field) has a long caption, you might want to use an abbreviation for the column heading. Like Caption, you can specify an expression of you wish. This expression is evaluated when the report is run. Press Enter to add a line break within the heading.
-
Format: this indicates how the value of the field is formatted. The format takes the form of “{0:format},” where format is a set of format symbols defining how the field is formatted. Commonly used format symbols are:
Symbol Description cn Displays the value using the currency settings specified in the Windows Regional Options Control panel (for example, "$" as the currency symbol, "," as the thousands separator, and "." as the decimal separator in North America) and the number of decimal places specified as n. For example, 4132 formatted as c2 displays as $4,132.00 in North America and €4.132,00 in Germany. 0 A place holder for a digit, padded with a zero if necessary. For example, 4132 formatted as 000000 displays as 004132. # A place holder for a digit, blank if necessary. For example, 4132 formatted as #####0 displays as 4132. , Displays the thousands separator symbol specified in the Windows Regional Options Control panel (for example, "," in North America). You only have to specify the character once, not once every three places. For example, 4132 formatted as #,##0 displays as 4,132 in North America and 4.132 in Germany. . Displays a decimal separator symbol specified in the Windows Regional Options Control panel (for example, "." in North America). For example, 4132 formatted as #,##0.00 displays as 4,132.00 in North America and 4.132,00 in Germany. % Multiples the value by 100 and appends a percentage sign. For example, 0.132 formatted as ##0.00% displays as 13.20%. dn For a numeric value, left-pads the value with zeros. For example, 10 formatted as d6 displays as 000010. d For a date/time value, displays the value using the Short Date setting based on the Locale setting. For example, January 10, 2013 2:22:30 PM displays as 1/10/2013 in the U.S. and 10/01/2013 in France. D Displays a datetime value using the Long Date setting specified in the Windows Regional Options Control panel. For example, January 10, 2013 2:22:30 PM displays as Thursday, January 10, 2013 in the U.S. g Displays a datetime value using the Short Date setting specified in the Windows Regional Options Control panel, including the time without seconds. For example, January 10, 2013 2:22:30 PM displays as 1/10/2013 2:22 PM in the U.S. G Displays a datetime value using the Short Date setting specified in the Windows Regional Options Control panel, including the time with seconds. For example, January 10, 2013 2:22:30 PM displays as 1/10/2013 2:22:30 PM in the U.S. t Displays a datetime value using the Short Time setting specified in the Windows Regional Options Control panel. For example, January 10, 2013 2:22:30 PM displays as 2:22 PM in the U.S. T Displays a datetime value using the Long Time setting specified in the Windows Regional Options Control panel. For example, January 10, 2013 2:22:30 PM displays as 2:22:30 PM in the U.S. For numeric values, you can specify how positive, negative, and zero values are displayed by separating the three formats with semi-colons. For example, {0:#,##0.00;-#,##0.00;””} formats positive numbers as #,##0.00, negative numbers as -#,##0.00, and zero as blank.
Other symbols can be used as well; see MSDN (such as http://msdn.microsoft.com/en-us/library/0c899ak8.aspx, http://msdn.microsoft.com/en-us/library/dwhawy9k.aspx, and http://msdn.microsoft.com/en-us/library/az4se3k1.aspx)
You can use a dynamic expression for Format by surrounding the expression with curly braces. For example, suppose you have a numeric field that contains the number of minutes a process takes but you want it displayed as HH:MM instead (for example, 65 should appear as 1:05). You can create a plugin function called, for example, GetHHMM, that returns the desired format. You would then specify that function in an expression in the Format property of the field. Specify the word “value” as a placeholder for the current value to format. For example:
{GetHHMM(value)}The function must accept a single parameter of type object and do any necessary conversion. Here’s what the GetHHMM function that converts the number of minutes into HH:MM looks like:
  [Formatter("HH:MM", typeof(Int16))]
  public static string GetHHMM(object minutes)
  {
     TimeSpan span = TimeSpan.FromMinutes(Convert.ToInt32(minutes));
     return span.ToString(@"hh\:mm");
  }
See the Functions topic for information on creating formatters.
-
Default summary: this setting specifies the default summary setting for the field in a report. For example, if this is set to Sum, when the field is added to a report, it will automatically sum the field.
-
Roles: the roles that can access the field (see the Creating a Role topic for information on roles). Leave this property blank to allow all users to access it. To change the roles that can access the field, click the drop-down button to display a TreeView of the defined roles and turn on or off the checkmarks in front of the appropriate role names. Click the drop-down button again to close the list.
-
Custom properties: Horizon Reports doesn’t use this property for anything. You can use it to hold any information you wish. The value is stored in the UserDefined property of the Field object, which a plugin could use for any purpose necessary.
-
Reportable: if this property is turned on (the default), the user can report on this field. Turning this property off means the user can’t add this field to a report. This is commonly done for fields the user never sees in the application, such as primary or foreign key fields or fields used for system purposes.
-
Filterable: turn this property on if the user can filter on this field. The default is turned on, but you may want to turn it off for fields that it may not make sense to filter on, such as Address.
-
Sortable: this property indicates whether the user can sort on this field. As with the Filterable property, you can turn it off for fields that it may not make sense to sort on, such as an address field.
-
Allow Values: if this property is turned on, the Values buttons in the Data Selection and Filter steps of the Report Wizard are enabled for this field. You may want to turn this property off if it takes a long time to gather a list of the distinct values for the field (such as for a large database).
-
Version: the field’s version number. A blank value means the field is not versioned: it appears in the report writer regardless of the version of the database. For a field that isn’t available in every version of the database, enter the version number followed by “+” to indicate the field appears in that version and higher versions and should not appear in lower versions (that is, the field was added in that version), “-“ to indicate the field appears in that version and lower versions and should not appear in higher versions (that is, the field was removed in the next version), or no suffix to indicate the field appears only in that version and should not appear in any other version. For example, “5.3+” indicates the field is available starting in version 5.3 while “5.3-“ indicates it was removed in version 5.4.
Use a comma-delimited list of values if the field was added in one version and later removed. For example, “5.3+,5.5-“ means it was added in version 5.3 and removed in version 5.6.
-
Order: the order of the field in the table. Normally you won’t change this value but if you want calculated fields to appear somewhere other than at the end of the list of fields when fields are displayed in database order, reorder the fields by clicking the Order link to display the following dialog:
Calc Page
The Calc page is used for calculated fields or those where the data displayed to the user is different from how it’s stored. For example, most order entry systems don’t store the extended price of an item, but derive it from the unit price multiplied by the quantity. However, you may want your users to be able to report on extended price, so you would create a calculated field for it.
This page is disabled if you’ve chosen any of the options on the Special page (discussed later).
Which properties appear on the Calc page depends on whether the field is real or calculated. The following properties appear for calculated fields.
 or functions built into the database engine. This option often leads to better performance, especially if this calculation will be used in filter conditions. Otherwise, use Expression.
-
Expression: the formula used to display the value in the field to the user. This can be an expression your database engine understands or a call to a plugin function. Fields should be aliased; that is, include the name of the table, such as “Customers.Company”. If either the table or field name contains illegal SQL characters (such as spaces) or match SQL keywords, place delimiters (the ones defined in the database properties) around the table or field name. For example, the UnitPrice field in the Order Details table should be entered with delimiters around the table name: [Order Details].UnitPrice.
-
Fields involved: a calculated field may derive its value from one or more real fields. For example, the extended price of an invoice item is calculated as the product of the unit price and the quantity. In order to perform the calculation, Horizon Reports needs to know which real fields to retrieve from the database. When you enter the Expression, Studio automatically parses it and places any field names it finds in this property. However, if you call a plugin function that does additional data access or use an expression such that the list of fields involved is incorrect, you need to enter the fields involved in the expression in this property. The field names should be fully aliased (that is, include the name of the table) and separated with commas. As with Expression, place delimiters around table or field names that contain illegal SQL characters (such as spaces) or SQL keywords.
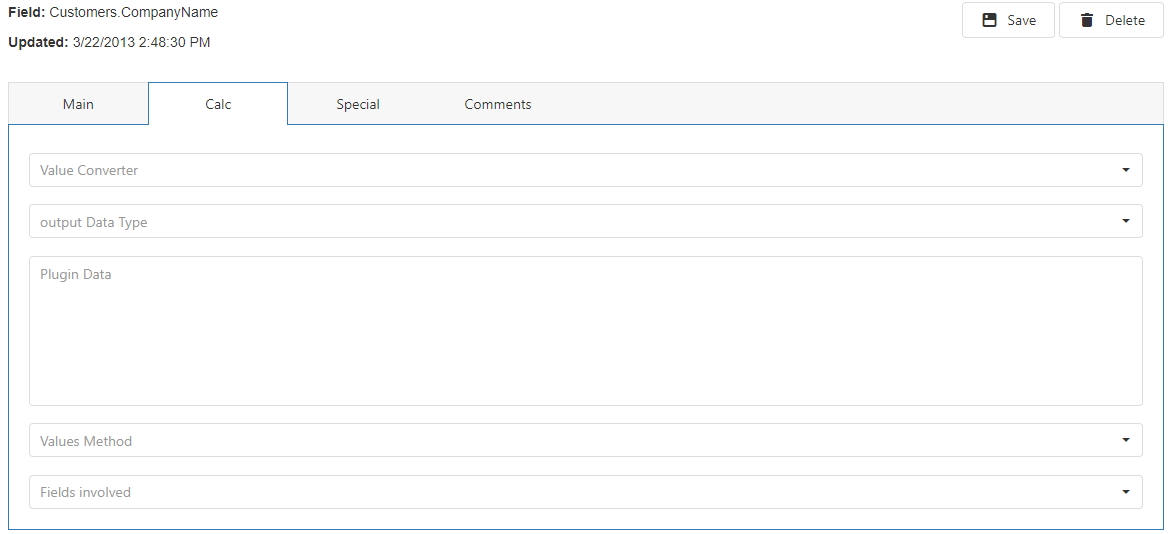
The following properties appear for real fields.
-
Value converter: the values actually contained in the field may not be what the user expects to see. Using a value converter plugin allows you to convert the values stored to the values to display. For example, Sage 300 ERP, an accounting application, stores dates as numeric values; January 10, 2013 is stored as 20130110. The end-user expects to see the date as 01/10/2013 (or however their Windows system is configured to display dates). The built-in NumericToDateValueConverter converts a numeric value to the corresponding date value. Other built-in converters are:
-
EnumeratedFieldValueConverter: Enumerated fields are those that contain a pre-defined set of codes that mean something. For example, in the sample Northwind database that comes with SQL Server, the ShipVia field in the Orders table contains a 1, 2, or 3. These values aren’t foreign keys looked up in another table, but rather hard-coded values, each of which represents a different shipping type. Often, these codes are displayed to the user in the application differently than they’re stored. For example, the user might see “Fedex,” “UPS,” or “Mail” for the ShipVia field rather than 1, 2, or 3. After selecting this plugin, you can value/description pairs that define the enumeration. In the Value column, specify the code value as stored in the field, and in the Description column, enter the value as the user sees it. Continuing with the above example, enter “1” for Value and “Fedex” for Description, “2” for Value and “UPS” for Description, and “3” for Value and “Mail” for Description.
-
ExcelDateToDateValueConverter: converts a numeric value using Microsoft Excel’s scheme (1 = January 1, 1990) to the corresponding date value.
-
LookupFieldConverter: looks up a value in another table and displays a field from that table. This is similar to the Display field from related table feature discussed below but doesn’t require a relationship between the tables.
The value converter uses a SQL statement with a subquery in the JOIN clause and not all database engines (for example, Microsoft Access) support that.
-
StringToDateTimeValueConverter: converts a string stored in one of several formats into the corresponding date value. If you don’t specify otherwise, the string is expected to be in the format YYYY-MM-DD HH:MM:SS.
-
StringToNumericValueConverter: converts a numeric value stored as a string to a numeric value.
-
NumericToBoolValueConverter: converts a numeric value to true (any value but 0) or false (0).
-
TFToBoolValueConverter: converts “T” to true and “F” to false.
-
YNToBoolValueConverter: converts “Y” to true and “N” to false.
You can create your own value converter plugins and then choose the appropriate one from the drop-down list.
-
-
Output type: this specifies the data type for the field as it appears in the result set for a report. It’s normally set automatically for a field using a value converter but there may be times when you have to set it manually.
-
Value converter data: specify any information required by the value converter.
-
Values method: when the user clicks the Values button in the report wizard, Horizon Reports displays a list of unique values for the selected field. This is done using a SELECT DISTINCT query on that field. However, there may be occasions when, due to the way the data is stored, you need a different mechanism for gathering the values to display to the user, such as calling a stored procedure. In that case, create a values method plugin and choose it from the drop-down list.
-
Fields involved: this control is only used when additional fields should be retrieved from the database when this field is. This is typically only the case when the fields uses a value converter and that converter needs to process other fields in addition to the one being converted. The field names should be fully aliased (that is, include the name of the table) and separated with commas.
Special Page
The Special page is used for settings about related fields.
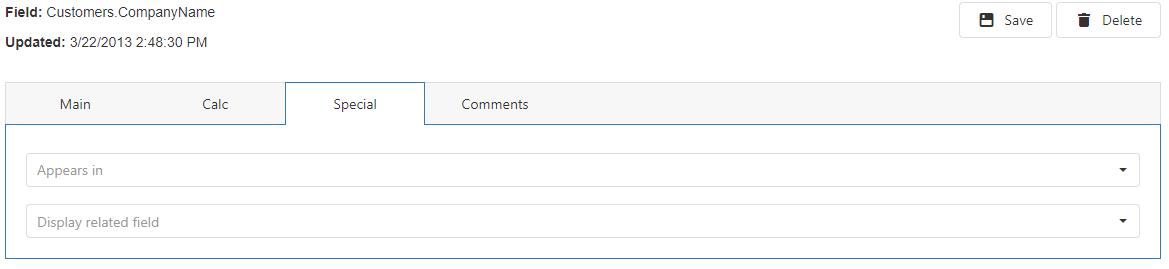
There are two ways you can display a value from a related table: by setting Appears in or Display field from related table.
You can set Appears in to as many tables as you wish to make this field appear as if it belongs to those tables; that is, this field shows up in the field list when you select one of those tables in step 2 of the report wizards. This is similar to the Display field from related table feature but doesn’t require creating a calculated field in each table. There must be a relationship between this table and the tables you select for this setting, even if it isn’t a direct relationship, because the effect of this setting is to add the field to a SQL statement. For example, if you set Appears in for Categories.CategoryName to the Products table, it’ll appear as if there’s a field in the Products table named CategoryName. When the user chooses CategoryName from the Products table, the resulting SQL statement is:
select Categories.CategoryName from Products join Categories...
For those fields that contain foreign keys, you likely don’t want to display the foreign key values to the user since they probably don’t see these values in your application and wouldn’t understand the values stored in the field. Instead, you may want to display a particular field from the table that this field contains the foreign key for. For example, the Products table in the Northwind database has a CategoryID field that contains the foreign key to the Categories table. It might make sense to display the CategoryName field from the Categories table when the user selects the CategoryID field, since that’s likely how they think of the category. This makes it easier for the user to display the category name for a product since they can don’t have to select the Categories table and then the CategoryName field.
To specify that a field from a related table is displayed in place of this field, choose the Special page, then select the desired field from the Display related field drop-down list (only fields from tables that are parent tables in relationships to the current table are available. The relationships must be simple ones, as complex relationships aren’t supported with this feature).
Comments Page
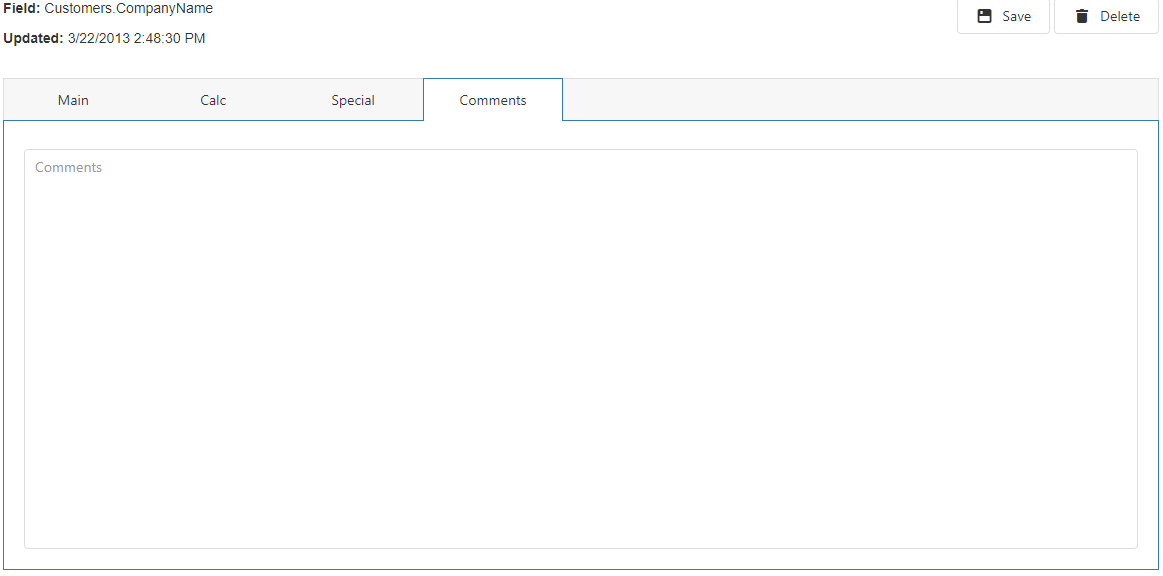
If you want comments about a field available to your user, such as a detailed description of the purpose or contents of a field, enter them on the Comment page.