Horizon Reports can be run using SSL (Secure Sockets Layer). This is a good idea, because user name and passwords are sent from the browser to the server and SSL ensures this is done securely (not that it’s an issue on your own machine but it is when you deploy to a production web server). The internet server requires a trusted certificate in order to access a web site using SSL. Without one (there isn’t one by default), you’ll get something like this when you launch:
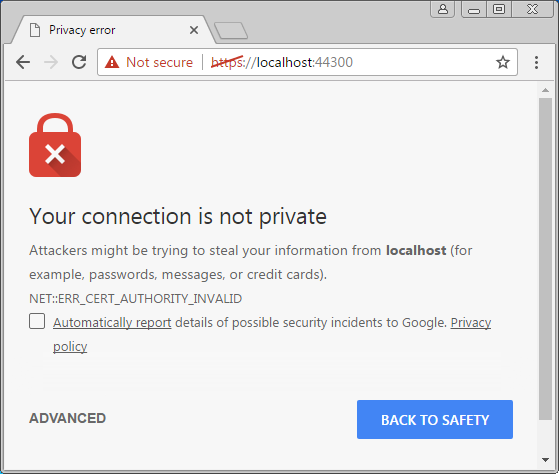
You can click the Proceed Anyway button to continue, but it’s a pain to have to do that every time. To install a certificate, do the following:
-
Run Microsoft Management Console. The easy way to do that is hold down the Windows key and press R to display the Run dialog, enter “mmc,” and click OK.
-
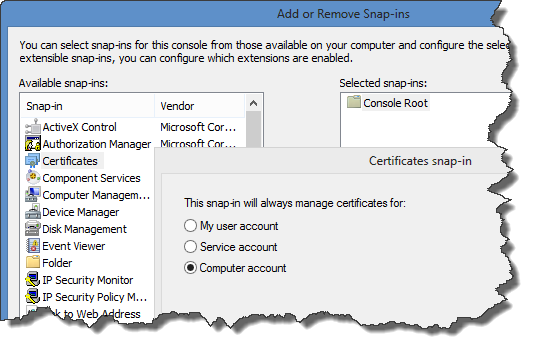
Choose Add/Remove Snap-in from the File menu and double-click Certificates. In the Certificates Snap-In dialog, select Computer account. Click Next.
-
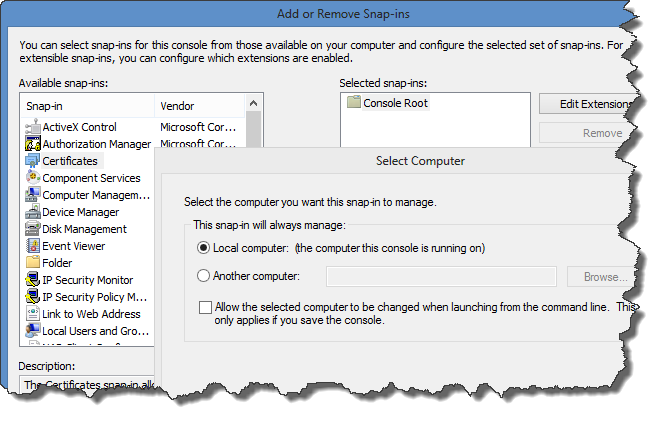
Choose Local computer, then click Finish in the Certificates Snap-In dialog and OK in the Add or Remove Snap-in dialog.
-
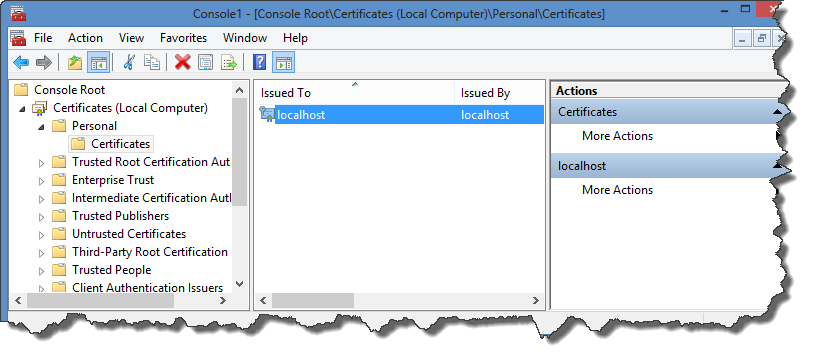
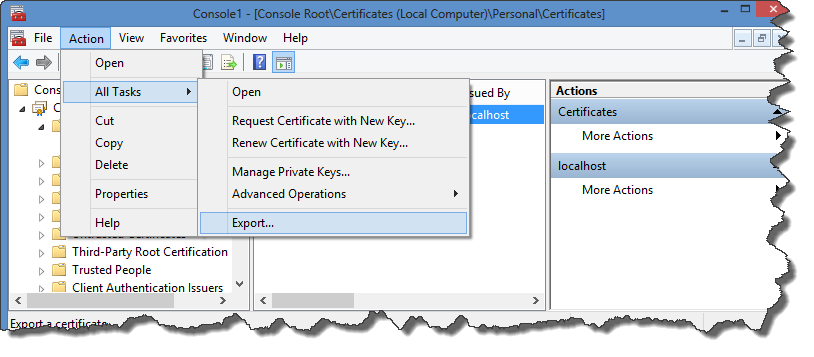
Expand Certificates, then Personal, select the Certificates folder under Personal, and click the localhost certificate.
-
Choose All Tasks from the Action menu and select the Export function from the submenu.
-
Click Next in the Certificate Export Wizard.

-
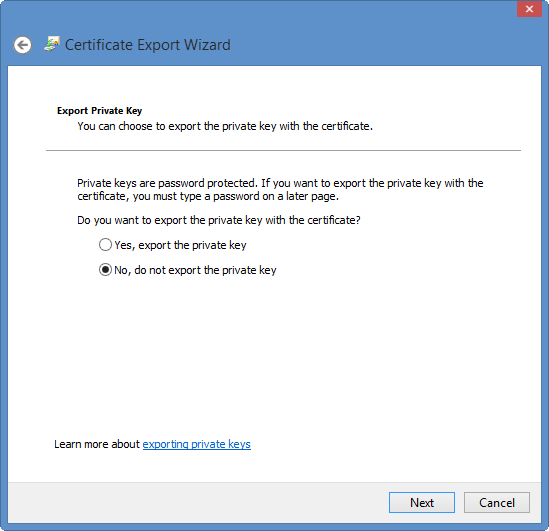
Choose No, do not export the private key and click Next.
-
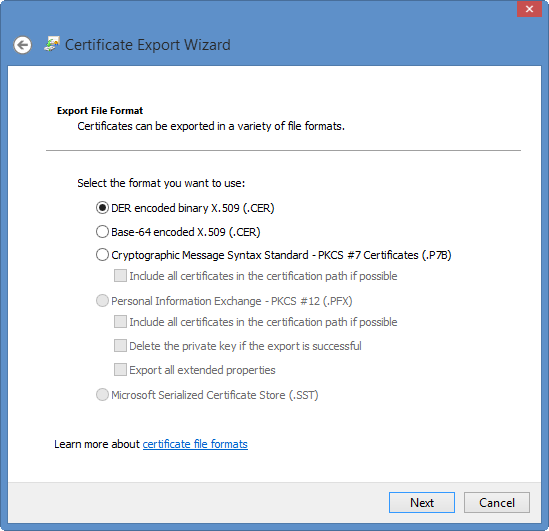
Choose DER encoded binary X.509 (.CER) and click Next.
-
Enter a path for the exported certificate, such as “C:\Users<UserName>\Desktop\IISExpress.cer,” where
is your Windows user name (the path and name aren't important since you won't be keeping the file permanently). Click Next and then click Finish. 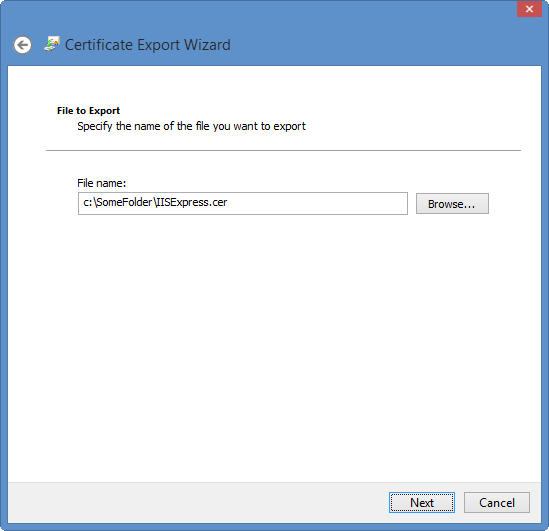
-
Expand Trusted Root Certification Authorities and select Certificates.
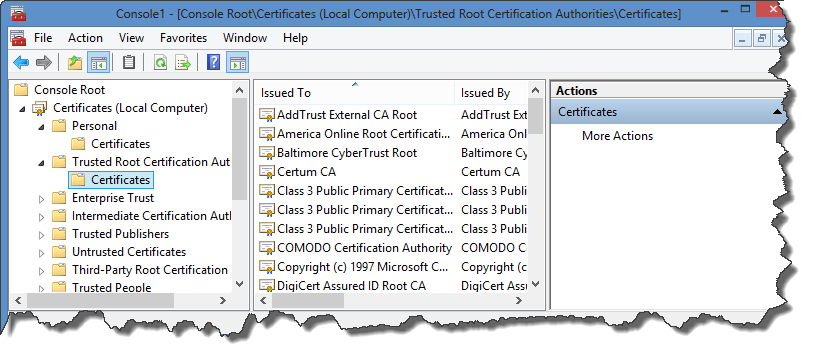
-
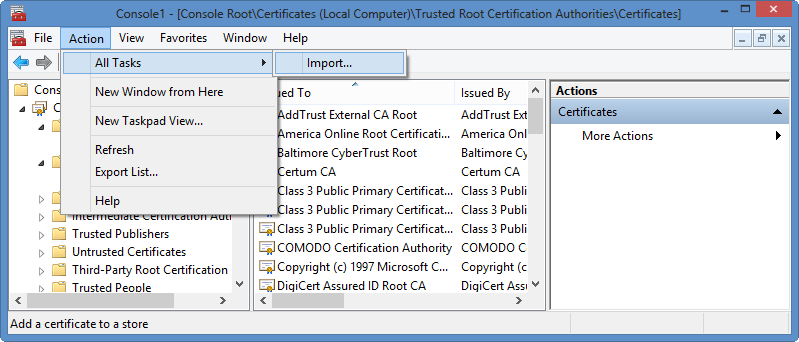
Choose All Tasks from the Action menu and select the Import function from the submenu.
-
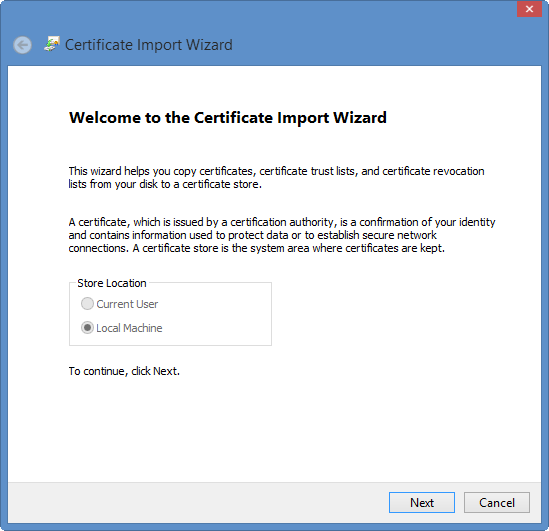
Click Next in the Certificate Import Wizard.
-
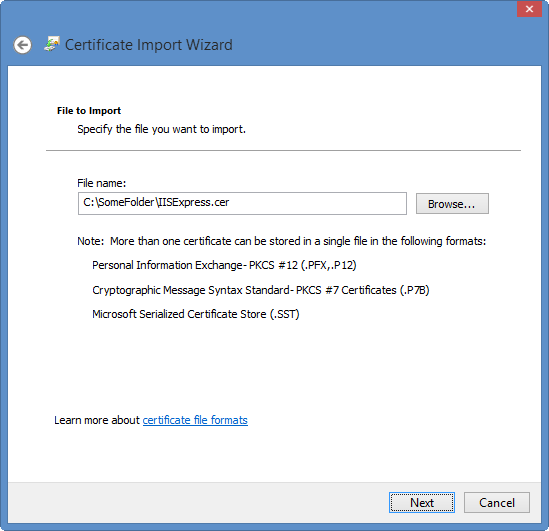
Enter the path you specified earlier when exporting the certificate and click Next.
-
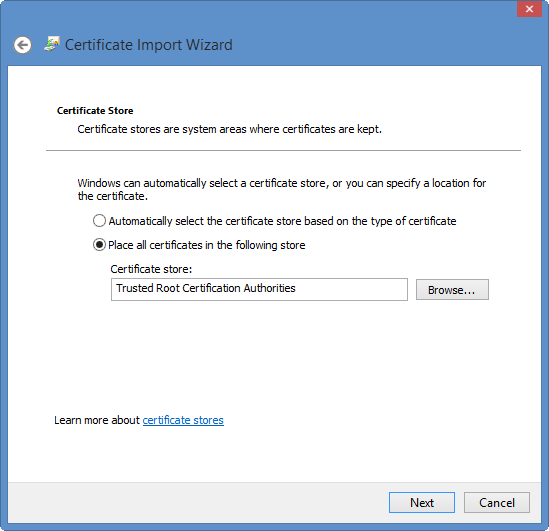
Choose Place all certificates in the following store and ensure the selected Certificate store is “Trusted Root Certification Authorities”. Click Next and then Finish.
-
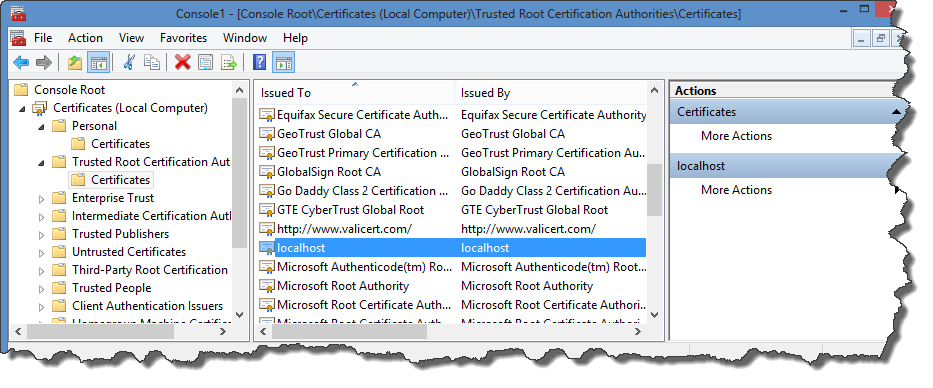
You should now see a localhost certificate in Trusted Root Certification Authorities.
-
Close MMC. You can choose No when asked to save settings to Console1.