To create a version of Horizon Reports specific for an application’s data, you must create a new reporting project. A project is a set of configuration files that tell Horizon Reports how it works with the data of a particular application.
The first time you start Horizon Reports, you’ll automatically be prompted to create a project. To create additional projects beyond the first, you can click the New menu item in the Projects menu.
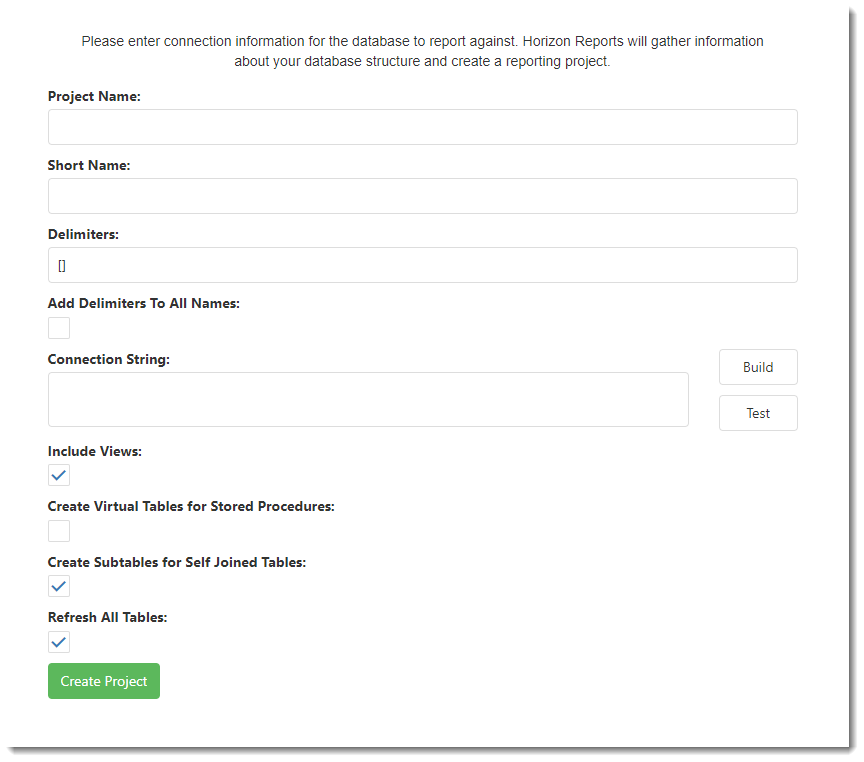
The new project dialog has the following options:
-
Project name: enter the name of the application as you want users to see it. Obviously, you can call it “Horizon Reports”, but that’s not a requirement; you can call it anything you wish, such as “My New Report Writer” or “Inventory Reporting System.” The value you enter here corresponds with the Application Name configuration setting.
-
Short name: this defaults to the name you enter for Project name but is used as an abbreviated name in various places. For example, if you set Project name to “The Northwind Company Reporting System,” you may want to use a shorter name like “Northwind Reporting” for Short name. This setting is stored in the Short Application Name configuration setting.
-
Name delimiters: Specify which characters to use as delimiters around table and field names that need delimiters (for example, names with spaces in them). Specify a two-character value, with the first character being the left delimiter and the second being the right. Examples are “”, meaning use double quotes, and [], meaning names are delimited with square brackets. MySQL needs the reverse apostrophe: ``
-
Add delimiters to all names: Turn this setting on if you want delimiters added to all names. When off, Studio automatically adds delimiters to table and field names it thinks need them: names containing illegal characters such as spaces or names using keywords such as TABLE.
-
Connection string: Enter the connection string for the application database you’d like to query against. Horizon Reports will use this connection to “discover” the metadata for a database, including all of its tables, fields, and relationships.
For ODBC, the connection string is typically something like “driver=ODBC driver name;server=server name;database=database name;uid=user name;pwd=password.”
For OLE DB, the connection string is typically something like “Provider=OLE DB provider name;Data Source=server name;Initial Catalog=database name;User ID=user name;Password=password.”
For SqlClient (the .NET provider for Microsoft SQL Server), the connection string is typically something like “Provider=System.Data.SqlClient;Server=server name;Database=database;User ID=user name;Password=password.”
See www.connectionstrings.com for connection strings for different ODBC drivers and OLE DB providers.
-
Include views: Turn this setting on if you want views included in the discovery.
-
Create virtual tables from stored procedures: With this option on, Studio creates virtual tables for any stored procedures in the database.
-
Create subtables for self joined tables: Turn this option on to automatically create a subtable any time any self-joined table or more than one relationship between the same set of tables is discovered. You can rename the subtable if you wish. See the Creating a Subtable topic for information on subtables.
Once you’ve filled in all the information in this dialog, click the Create Project button.
Horizon Reports Studio then performs the discovery process. After the discovery process is done, a TreeView is displayed showing the results of the discovery process.